 |
| Semi-rigged and almost ready |
The list of jobs has been long, and divides roughly into three areas:
- problems seeking a solution, mainly inherited from the previous owner;
- desirable modifications;
- routine maintenance.
Of course, all of these matters are necessarily ongoing - one could never imagine reaching a point when everything was done. Above all, I'd be ready to drop all of the above were the opportunity to sail again to become a serious prospect - but, for that to happen, it would have to include the possibility of overnight stops and this is yet to become an approved activity.
So, in the mean time, this post is an account of ongoing work, tackling the many matters that have needed attention.
Mast base (tabernacle)
The tabernacle had been lifting on one side, the screws securing it to the cabin having become loose. the obvious fix has been to remove the tabernacle, drill out the screw holes, bond in a plug, redrill and then refit.
The tabernacle was slightly buckled and I had a go at trying to force-straighten it but it wouldn't shift. This means that, left on its own, the base doesn't fit flush with the cabin top. However, the refitted tabernacle, once screwed down, seems secure enough and the screws force it to sit correctly. So far, I've lifted the mast once, and everything has remained secure and in place.
Various scrapes along the topsides of the hull - all of these inherited from the previous owner.
Mast base (tabernacle)
The tabernacle had been lifting on one side, the screws securing it to the cabin having become loose. the obvious fix has been to remove the tabernacle, drill out the screw holes, bond in a plug, redrill and then refit.
The tabernacle was slightly buckled and I had a go at trying to force-straighten it but it wouldn't shift. This means that, left on its own, the base doesn't fit flush with the cabin top. However, the refitted tabernacle, once screwed down, seems secure enough and the screws force it to sit correctly. So far, I've lifted the mast once, and everything has remained secure and in place.
 |
| Removed tabernacle, revealing offending screw holes. I had to fare away some loose paint, rub down, epoxy and then repaint the whole area. |
 |
| Refitted tabernacle now fitting snugly against the cabin. The mast now fits perfectly and lifts much more easily. |
Centreboard case topping
Last season, water was sloshing in through a gap between the table top and the casing. At the time, I took a rather drastic step of using silicone sealant which certainly stopped the issue, although left the table glued to the casing. It being clearly desirable, at times to lift off the table for inspection, I have now removed this glue and inserted a 3mm neoprene seal. This was rather thinner than expected, so I put a layer on both the underside of the table, and the top of the casing. If this fails, I may purchase a thicker option and have another go.
While the table/topping was off, the underside needed filling from various gouges in places, and coating with something protective.
Carbon fibre splintering on mast
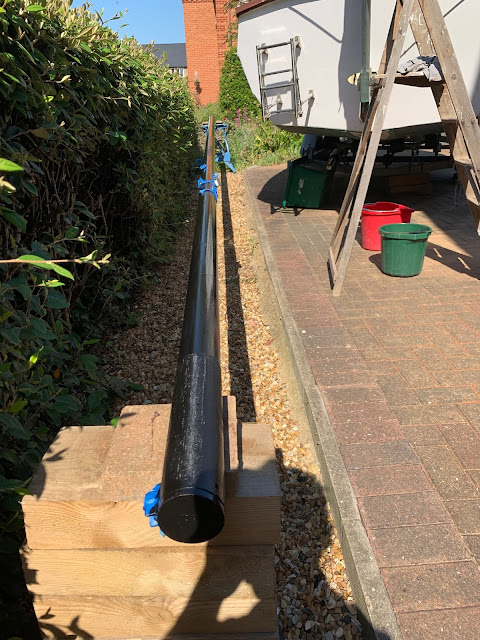
Carbon fibre masts ultimately degrade from sunlight and this results in splintering of the surface. Ultimately, this could damage the structural integrity of the mast but, at this early stage, the main issue is with the unpleasant rash caused by the splintering. The tabernacle pictures above give a good idea of the state of the mast, grey in colour, with engrained carbon fibre strands almost visible length-ways.
Following advice on the Swallow Yachts forum, this has been corrected by two coats of two pack paint.
 |
| Mast after first coat of International Perfection two-pack Jet Black paint |
Various scrapes along the topsides of the hull - all of these inherited from the previous owner.
I'm slowly working my way round these and learning how best to achieve a finish which maintains the excellent original finish. One day, I shall probably end up having to repaint and, following advice, have decided that professional paint finishes will be prohibitively expensive and hard to maintain. Moreover, the two-pack route seems so fiddly. So, I am going down the single pot route which better suits my limited skills.
The various patches applied look ok - much better than the repairs done by the previous owner, and certainly watertight.
Installation of basic electrics
The idea is not to go for expensive and extensive installations. My needs are simple - an echo sounder, possibly some navigation lights eventually (although I have some battery versions for temporary usage), a 12v charger and wiring for the chart plotter.
The echo sounder involved the drastic step of cutting a hole in the cabin bulkhead - not for the faint-hearted!
I'm currently busy building a removable box for the various electrical connections. Again, the idea is for nothing too fancy at this stage - just somewhere for the wires to go. Once this is installed, a further photo will be shared.
The future agenda - various jobs still to do...
 |
| Well, I can see where the patch is, but it's hard to spot in a photo! |
The various patches applied look ok - much better than the repairs done by the previous owner, and certainly watertight.
Installation of basic electrics
The idea is not to go for expensive and extensive installations. My needs are simple - an echo sounder, possibly some navigation lights eventually (although I have some battery versions for temporary usage), a 12v charger and wiring for the chart plotter.
The echo sounder involved the drastic step of cutting a hole in the cabin bulkhead - not for the faint-hearted!
 |
| The hole is cut! |
 |
| Echo sounder in place |
 |
| Inside view. |
The future agenda - various jobs still to do...
Not recovering straight onto trailer - ongoing. Difficult to solve when we're not able to launch!
Strongly considering having trailer modified to a braked version. What's the point of a cabined boat if you can't load it up with kit and kerboodle? 100kg is soon breached especially since outboard, main anchor & chain, kedge, ropes are all a part of the 100kg. Plus, I want to kit out the cabin with some permanent fixtures and fittings - all adding to the weight. To me, the trailer should have been braked from the outset, an unbraked one is a bit of a false economy.
Trailer wheels need replacing with non-rusting ones...!
Trailer wheels need replacing with non-rusting ones...!


